
In my second post, I covered the basic construction of the bed I built for my daughter. Here I explain the lighting system and the painting and finishing process. If you love watching paint dry, you’ll love reading about it!
Lighting
My daughter loves to read, so I designed the bed with a cozy kid-sized reading nook on the bottom. I like exploring the concept of kid-scale vs. adult-scale in design. The built world is made for adults. But the ceiling of this space is uncomfortably low for a grown-up, so it’s really a kid space–it belongs to her. (Children immediately notice these details.)
Nobody wants to read in a dark cave of course, and it would be inexcusable for a piece of custom furniture to have an awkwardly added-on light. I searched around for lighting that would satisfy my goals. I wanted low glare–a good feature of any reading light, but one that’s extra welcome for glossy children’s books. I wanted exceptional color rendering, because I am a photographer obsessed with the dismal quality of most LED light sources. And I wanted the sources to be nearly invisible.
The obvious choice these days is flexible LED tape strips. That might have been fine, but they have some drawbacks that drive me crazy. Chiefly, multi-shadowing caused by the large number of point sources of light, which is almost impossible to correct at close range, even with diffusers.
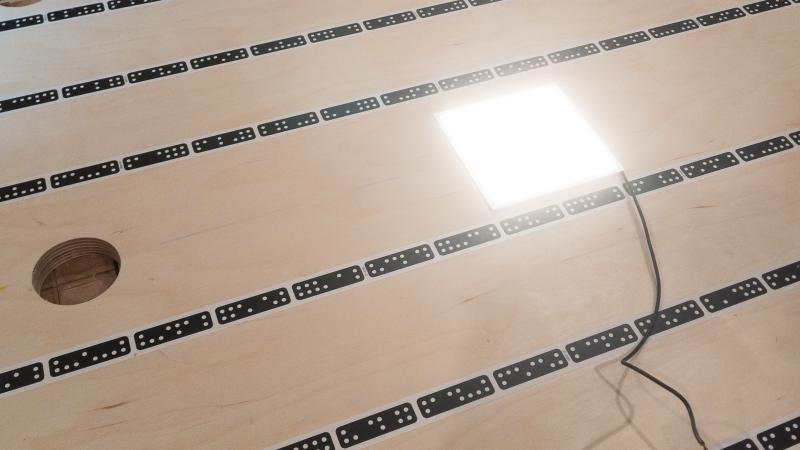
I wound up choosing Hikari SQ light panels from an Irish company called Lightly. This is an incredible product. Basically they have turned flat-panel display backlighting technology into an illumination product. A ring of very high-quality LEDs pump light into a well-engineered flat plastic light guide that emits photons evenly over its entire 100x100 mm surface–in a package that’s only 3.2 mm thick. The large apparent source size is the secret to low glare, and they’ve chosen great LEDs that render color as well as anything on the market. I will be using these again!
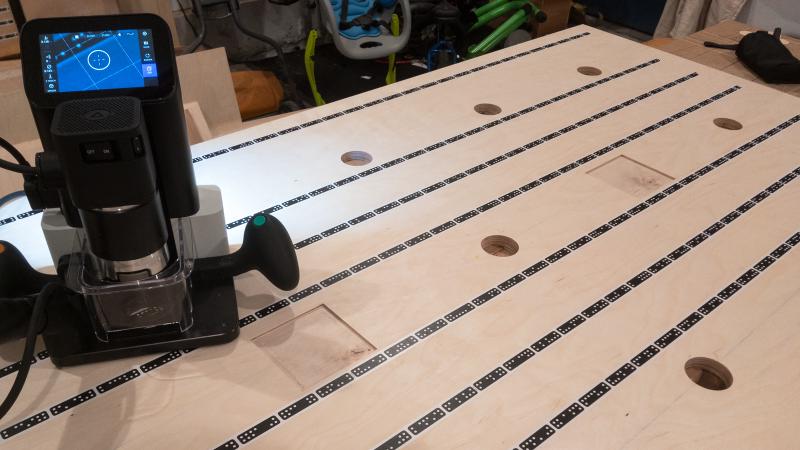
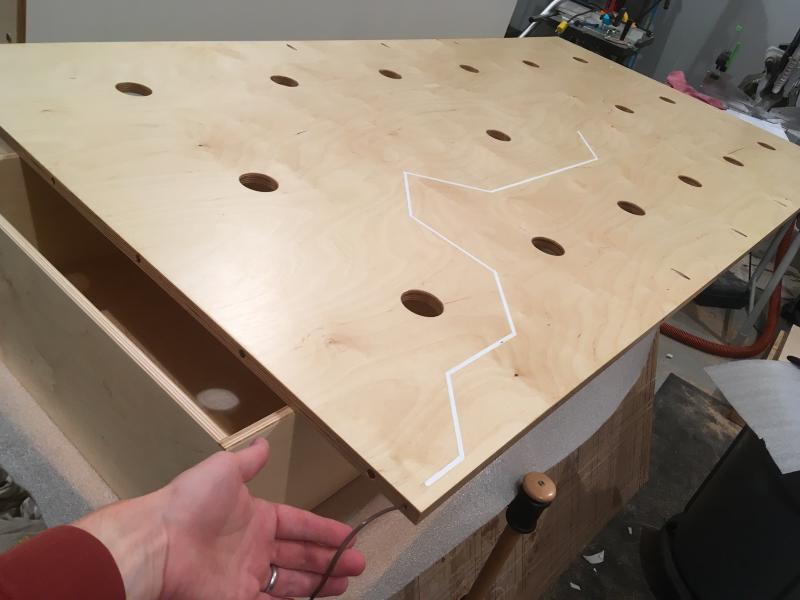
A neat thing about a light source that’s only 3.2 mm (1/8 inch) thick is that you can fully recess it into a piece of plywood without any meaningful loss of strength. I needed two lights to provide even illumination, so I planned those pockets into the grid of mattress vent-holes in the floor of the bed. The Shaper Origin makes quick work out of cutting square pockets in things.
I did a power-on test to remind myself how awesome these lights are. Did I mention that I like testing?
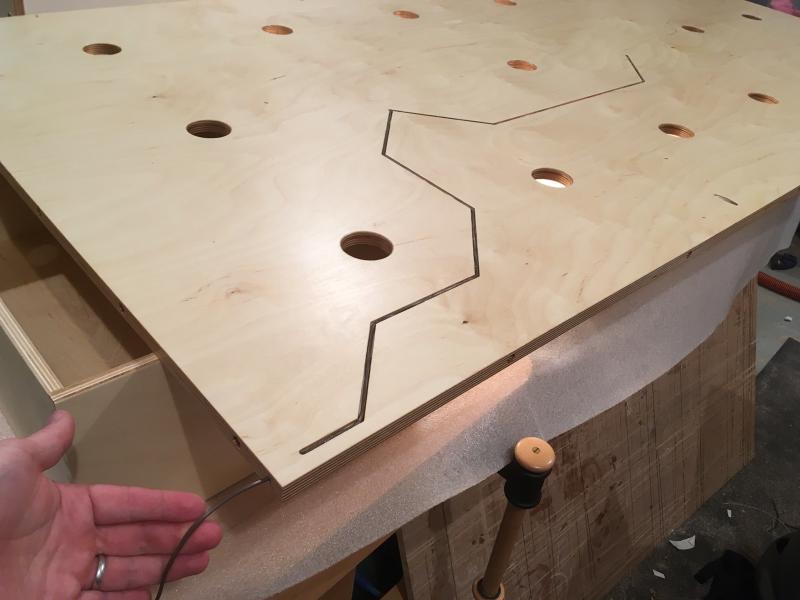
Now for one more detail. Nobody wants to see wires! That would ruin the magic. Behind the lights, on the mattress side of the bed floor, I cut a groove for the wire. Forgive the zig-zaggy shape–I’ve been routing too many circuit boards at my day job.
With some diagonal hand-drilling, I fashioned this transition which allows the wire to pass through the side of the bed and into the stair unit (where the LED driver lives) without being seen.
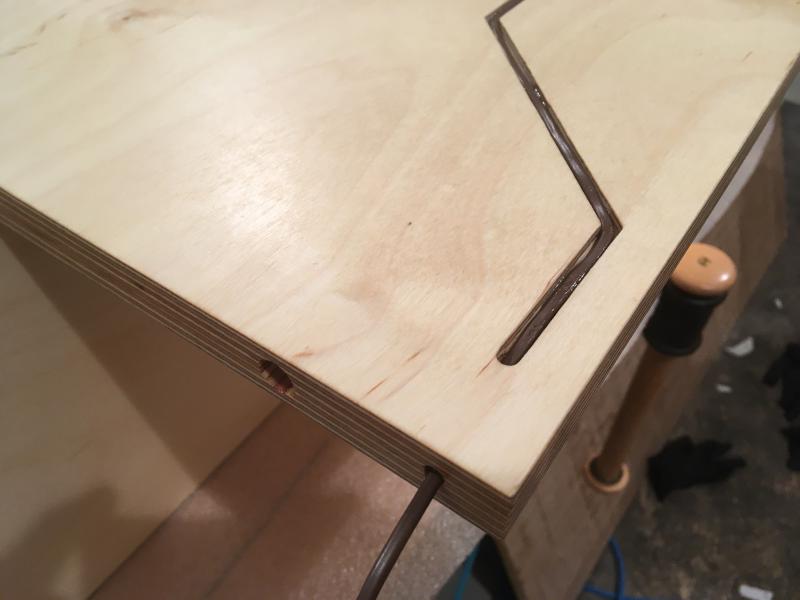
After tacking the LED wiring neatly into the groove with superglue, I back-filled it with silicone caulk to protect it from damage. Done. Maybe a little over-engineered.
Painting and Finishing
Finishing is my least favorite part of any project. I mean “finishing” in the sense of applying wood finish. Of course I like to be finished. Right?
I wanted a combination of white and natural birch surfaces for this project, and I was really hoping to get them in the most environmentally-friendly way possible. Not just for the benefit of the outdoor environment, but the indoor one–many indoor materials and finishes emit VOCs over a period of time and there are probably health consequences that we don’t fully understand.
I chose traditional milk paint for the white surfaces. It’s an incredibly benign product with a lovely texture and interesting tints if that’s what you seek. But if you want a perfectly smooth, opaque surface with a small number of coats, it’s an infuriatingly slow way to go. Next time I want solid white on my plywood I’ll probably go with a surface laminate, or maybe modern paint.
For the top coat, I went with Osmo Polyx-Oil 3043. This magical finish, from a German company, is relatively new to the North American market. It produces a hybrid penetrating and surface finish that doesn’t chip and seems to last forever. Improbably, it is made of mostly plant-derived oils and waxes. Buy it from the nice people at Tools for Working Wood in Brooklyn. In a moment of weakness I bought one can from Amazon and of course it arrived with a huge dent in the side. TFWW has never let me down.
The one drawback to Osmo Polyx-Oil is the cure time. Each coat takes up to 24 hours to cure–and each side of each part would need about 3 coats of finish. I applied the finish to individual pieces prior to assembly. You can imagine that this process stretched on for what felt like an eternity.
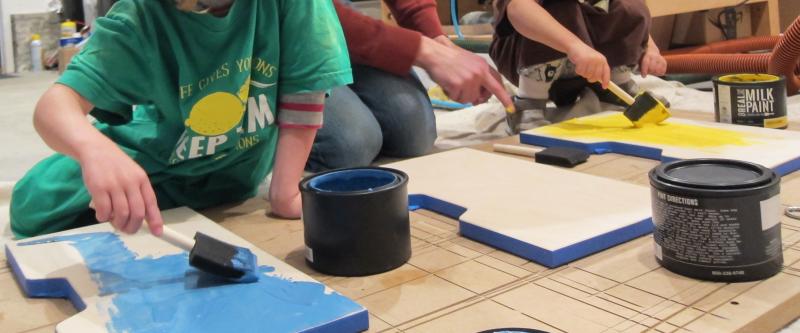
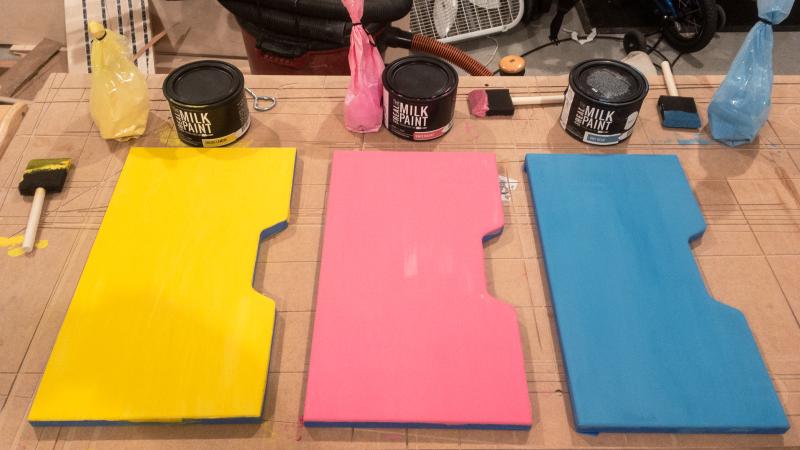
I almost forgot the drawers. I gave my daughter a complete set of paint swatches and let her choose her three favorite colors. I love watching how kids contemplate possibilities. Then the kids got to paint the drawer fronts. (Advantage milk paint! Totally harmless stuff.) This was my favorite part of the finishing process by far. I think they did a pretty good job!
Coming up in part 4: final assembly!